Campervan Refrigerator, Bed & Storage Complete Usage Guide | Equipment Tips for Comfortable Long-Distance Hokkaido Travel [2026]
A practical guide to making the most of campervan equipment — refrigerator, bed, and storage — for comfortable long-distance travel in Hokkaido.
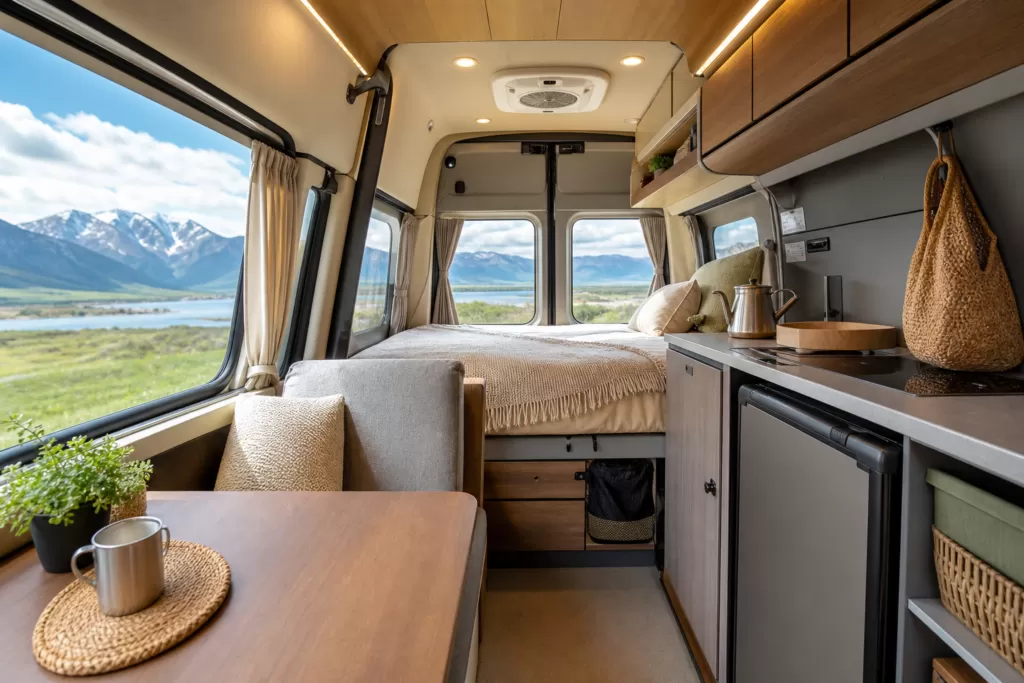
When traveling around Hokkaido by campervan, the long driving distances mean how well you can use the vehicle’s interior features has a huge impact on how comfortable the whole trip feels. The refrigerator, bed, and storage are the three pieces of basic equipment you’ll use every single day. Whether you understand and use them correctly changes the quality of the entire trip.
This article is a follow-up to our series covering a campervan’s air conditioning, heating, and power systems, and digs into the practical side of interior equipment. Reading it before your rental pickup will cut down significantly on trial and error once you’re on the road.
Why Equipment Makes or Breaks Comfort on a Hokkaido Trip
What stands out about a Hokkaido campervan trip is the sheer driving distance. It’s about 330 km from Sapporo to Shiretoko, and about 280 km to Wakkanai. If you’re thinking in mainland-Japan terms of “just a quick trip over there,” a 3-4 hour drive one way quickly becomes the norm.
The longer you’re on the move, the more time you spend inside the vehicle. Can you keep your food fresh? Can you sleep soundly at night? Can you grab what you need right away? Small frustrations like these add up, and fatigue starts showing by the second half of the trip. On the other hand, once you know how to use the equipment well, the cabin becomes a comfortable living space even on travel days.
Hokkaido also sees temperatures drop in the morning and evening even in summer. Even in July and August, early-morning temperatures can dip below 15°C on some days, so you need to be mindful of food storage too. If you don’t understand how the refrigerator’s performance relates to power use, you risk spoiling food or draining your battery.
What Happens Without Enough Understanding of the Equipment
If you don’t understand the refrigerator’s power draw, the sub-battery can drain overnight, leaving you unable to start the engine the next morning. If you get in without knowing the bed layout, setting up your bed for the night can take 30 minutes. If you don’t know where your storage spaces are, luggage can shift and become dangerous while driving.
These are all problems you can avoid with a bit of advance knowledge. Let’s go through each one in order below.
Types of Onboard Refrigerators (Compressor vs. 3-Way) and How to Run Them
Campervan refrigerators mainly come in two types: compressor-driven and 3-way. Since their cooling mechanism and power draw differ, so does how you should operate each one.
Compressor Refrigerators
These work on the same principle as a home refrigerator. They cool efficiently and aren’t affected much by outside temperature, holding a stable 5-10°C inside.
Power draw during normal operation is 40-60W. With a 100Ah sub-battery, a simple calculation gives roughly 20-25 hours of runtime. However, since batteries degrade faster once you’ve used more than 50-80% of their capacity, a realistic estimate for practical continuous runtime is around 8-12 hours.
While driving, the alternator helps recharge the battery, so if your schedule has you driving 4-5 hours or more a day, power shouldn’t really be an issue. If you have access to an AC outlet at a campsite, running the fridge on shore power overnight helps conserve your battery.
3-Way Refrigerators
“3-way” refers to a refrigerator that can run on three power sources: AC power, DC power (12V), or gas. It uses absorption cooling, which is nearly silent. However, cooling efficiency is lower than a compressor model, and the interior temperature can rise more easily when it’s hot outside.
When run on electricity, power draw is 70-100W (in AC mode), higher than a compressor unit. Switching to gas operation brings power draw to zero, but some campsites restrict the use of gas appliances.
When running a 3-way fridge on electricity, the standard approach is DC 12V (direct from the alternator) while driving, and AC 100V once parked or at a campsite. Running it on the sub-battery alone for long stretches isn’t efficient in terms of power consumption.
Practical Rules for Using the Refrigerator
There are a few things that apply to both types. First, chill the interior before loading food. Loading a large amount of room-temperature food takes time for the interior to cool back down, which increases power consumption during that stretch. Ideally, plug it in the day before departure so it’s already cold.
Next, minimize how often you open the door. The more frequently you open and close it, the more cold air escapes and the harder the compressor has to work. Keeping track of what’s inside and grabbing everything you need in one go becomes a habit that saves power.
Organizing the interior also matters. Grouping food into plastic bags or storage containers makes it faster to grab what you need, shortening how long the door stays open.
Bed Layout Types and Tips for a Good Night’s Sleep
A campervan’s bed layout varies by vehicle type. Knowing the common layouts makes it easier to picture how things will work before you even get in the vehicle.
Fixed Bed Layout
This layout has a bed permanently set up at the rear of the cabin. There’s no setup hassle — you can go straight to sleep. It’s common in Cabcon-type campervans. The “Cresson Journey” that Moving Inn rents out also has a fixed bed at the rear.
The downside is that the bed space is permanently occupied, limiting where you can put luggage. It calls for more creative storage solutions.
Dinette Conversion Layout
In this layout, you rearrange a table and seats to create a bed. It works as a dining or work space during the day and converts into a bed at night. Since it lets you use the same space for two purposes, this layout is common in kei-car-based campervans and Vancons.
It’s important to understand the conversion steps ahead of time. The first time, it can take 15-30 minutes. Check a video or the manual before your rental, or ask staff to walk you through it in person at pickup.
Bunk Layout (Over the Cab)
This layout has a bed in the space that overhangs above the driver and passenger seats. It’s common in Cabcons and serves as a second bed level in addition to the one at the rear. The upper bunk is often used by children or for storing luggage. Since it sits up high, be careful about rolling over in your sleep.
A Pre-Sleep Routine for a Good Night’s Rest
A little preparation before bed goes a long way toward sleeping well in a campervan. First, once the bed is set up (for a dinette-conversion layout), arrange your bedding properly. Since it takes a few minutes for the inside of a sleeping bag to warm up with your body heat, it helps to get in a little early, or fill a plastic bottle with hot water to use as a makeshift hot water bottle.
Dimming the interior lights and lowering your phone screen brightness also makes it easier to feel sleepy. If outside light bothers you, holding a reflective sheet up to the window doubles as a blackout curtain. Once the engine is off, you’ll hear the campsite’s ambient sounds — insects, wind, a nearby river. Bringing earplugs helps if you’re sensitive to noise.
Tips for Better Sleep: Condensation and Insulation
Since temperatures drop at night in Hokkaido, condensation on the windows happens easily. The temperature difference with the outside air causes water droplets to form on the inside of the glass, and if left alone, it can dampen your bedding.
An effective countermeasure is holding a reflective insulation sheet (“gin mat”) up to the window. You can use a commercial window-insulation panel made for overnight parking, or a cut-to-size reflective sheet from a home improvement store, sized to fit your window. The insulation cuts down on condensation and blocks outside cold air. In summer, it also works as a sunshade.
Running the roof vent fan on low while you sleep lets interior moisture escape and helps keep condensation down. The general approach is to sleep with the engine off, but the vent fan can run off the sub-battery.
Your choice of sleeping bag matters too. Even in a Hokkaido summer, some areas see early-morning temperatures of 10-15°C. It’s reassuring to bring a sleeping bag rated comfortable down to 5-10°C.
Organizing Storage Space and Balancing Your Load
A campervan has more storage space than a regular passenger car, but for a trip of a week or longer, you’ll still need to think about organization. Simply deciding in advance where everything goes eliminates time spent hunting for things mid-trip.
Types of Storage Space
A campervan’s storage generally breaks down into four types.
Under-floor storage: for large items. This is where you’d store bulky, infrequently used gear like tents, chairs, and BBQ equipment. It’s positioned to hold heavier items too, though you’ll need to crouch to reach it.
Overhead cabinets: for light items — clothing, towels, toiletries, and the like. Since items can fall out from vibration while driving, the golden rule is never to store anything heavy up there.
Under-bed storage: the space beneath a fixed bed. Well-suited to medium-sized items. It’s commonly used for food stock and cooking gear.
Interior table area and shelves: for everyday items, seasonings, stationery, maps — things you want within easy reach. A rubber non-slip mat helps keep things from sliding around while driving.
Preventing Your Load from Shifting While Driving
Hokkaido’s roads have long straight stretches with sustained high-speed driving, but there’s no shortage of rough surfaces too — gravel roads, farm roads, and unpaved parking areas. Vibration while driving can shift items on shelves or pop open a storage door and spill the contents.
Just laying down a rubber non-slip sheet on your shelves dramatically cuts down on shifting. You can find these at a 100-yen shop. Make it a habit to always check storage doors are closed before driving. For doors with a weak latch, you can also secure them with a bungee cord.
Never leave items on the table while driving — that’s a hard no. Sudden braking can send loose items flying, which is dangerous. Make it a habit on every trip to do a quick check of the cabin before setting off, securing or stowing anything that could move.
Using Divider Boxes, Nets, and Hanging Storage
Loading items loosely into a large storage space means they’ll roll around and end up scattered while driving. Organizing with items you can pick up at a 100-yen shop or home improvement store makes a big difference in how easy things are to find.
Divider or container boxes: group items by category — food, cooking tools, hygiene items, and so on. Lidded boxes let you stack them, making use of vertical space too. Matching colors or shapes makes it easier to spot what you need at a glance.
Nets (to prevent items shifting): attaching a pocket-style net to a shelf or wall creates a fixed spot for small items — your phone, charging cables, a lighter, a handheld flashlight, and other things you reach for often. Hook-mounted wall nets also work well for storing clothing or bags.
Hanging storage: pockets that hook onto the passenger headrest, or hanging bags that clip onto a curtain rail, are widely available. Keeping things you use often — a map, guidebook, a small trash bag — within this kind of storage means they’re within reach from the passenger seat even while driving.
Compare Hokkaido Campervan Rentals
Base yourself at New Chitose Airport and compare rates, vehicle types, and pickup locations all in one place.
Compare rental companies and prices →Sample Packing List for Food and Gear, and Weight Balance
On a week-long Hokkaido campervan trip, you’ll be loading food, cooking tools, clothing, and outdoor gear all at once. With that much volume, it affects your overall weight balance, so packing needs a deliberate plan.
Weight Balance Basics: Keep the Center of Gravity Low and Even Front-to-Back
The higher the vehicle’s center of gravity, the less stable it feels in curves or under hard braking. Place heavy items as low as possible — under-floor storage or under-bed storage. Putting heavy items on an overhead shelf is dangerous: they can fall from vibration, and it raises the vehicle’s overall center of gravity, affecting handling stability.
Front-to-back balance matters too. Concentrating heavy luggage at the rear makes the front lighter and can make steering unstable. Especially for long drives, the basic rule is to keep heavy items toward the front or center. Take note of where your water tank, battery, and food containers — the heaviest items — are located.
Sample Packing for a Week-Long Trip
Here’s a sample loadout for two adults on a 7-night trip.
Refrigerator (40-50L capacity): meat, fish, dairy, two 2L bottles of drinking water, fruit, cheese, butter. Grouping items into compact commercial storage containers makes efficient use of interior space. Drinking water is more space-efficient in a collapsible water jug than in plastic bottles.
Under-floor storage: two folding chairs, a small table, a BBQ grill, charcoal, a fire pit stand, a lantern, a generator (if you have one). Group together low-frequency, bulky items here.
Under-bed storage: 5kg of rice, pasta, canned goods, a seasoning box (soy sauce, salt, oil, etc.), cooking tools (frying pan, pot, knife, cutting board). Keeping your food stock consolidated here makes it easy to manage.
Overhead storage: changes of clothes (one person’s worth, compressed with roll-packing), towels, rain gear, sandals, a bag for hiking shoes. Light items only.
Planning Your Load Around Buying Locally
Michi-no-Eki, supermarkets, and farm-direct produce stands are scattered all across Hokkaido. You don’t need to load every bit of food before you leave — you can buy locally along the way. Fresh fish, vegetables, and dairy in particular are often fresher and cheaper bought near where they’re produced.
When planning your load, it’s practical to think “pack light at departure, restock locally.” Load shelf-stable items like seasonings, dried goods, and rice from the start, and buy fresh food along the route as you go. This also makes more efficient use of your refrigerator’s capacity.
Choosing Cooking Tools: Compact and Multi-Purpose
The basic rule for cooking tools is to keep the count low and pick items that serve multiple purposes. One frying pan, one small pot, tongs, and a silicone spatula can handle nearly everything — stir-frying, simmering, boiling water, cooking pasta. A folding knife and a folding cutting board save space too.
For tableware, melamine or metal outdoor-style dishware is light, doesn’t break easily, and stores compactly. You can also rely heavily on paper plates and cups, but since many Hokkaido campsites require you to take your trash with you, keep in mind that this increases how much garbage you’ll be carrying.
Bringing seasonings split into zip-lock bags or small bottles, instead of hauling entire large-size jars, saves both weight and volume. Soy sauce, salt, pepper, oil, and sugar — with those five, you can handle most cooking needs.
Handling Items Once You’ve Used Them Up
As the trip goes on, food supplies dwindle and space opens up. You can use that newly freed space for souvenirs, local produce, or dairy products from a farm you bought along the way, making good use of it for your trip back. Picturing your original loading layout in advance makes it easier to predict where space will open up later in the trip.
New Chitose Airport / Tokachi-Obihiro Airport
Rent the Cabcon “Cresson Journey”
Base yourself at New Chitose Airport and travel all across Hokkaido by campervan.
See details at Moving Inn →Frequently Asked Questions (FAQ)
Q: How big is the refrigerator, and how much food can it hold?
It varies by rental vehicle, but a typical campervan has a refrigerator of around 40-70L. Loading 3-4 days’ worth of food (meat, fish, vegetables, drinks) for two adults will fill it up close to capacity. For longer trips, it’s more realistic to restock along the way at local supermarkets or Michi-no-Eki.
Q: How long does the sub-battery last?
It depends on the sub-battery’s capacity and how much power your devices draw. Running a refrigerator (50W) off a 100Ah battery gives a theoretical figure of about 20 hours, but factoring in battery degradation, other devices in use, and temperature conditions, a practical estimate is around 8-12 hours. Since the alternator recharges the battery while driving, you’re unlikely to run short on power if you’re driving 4-5 hours or more each day. If a campsite has an AC outlet, make active use of shore power.
Q: Why do the windows fog up with condensation while I sleep? Is there anything I can do about it?
The temperature difference between the cabin and the outside air causes water vapor to condense on the inside of the glass. This happens especially easily in a Hokkaido summer, when morning and evening temperatures drop. Two effective countermeasures: hold a reflective insulation sheet (“gin mat”) up to the window for insulation, and run the roof vent fan on low for ventilation. Commercial window-insulation panels made for overnight parking work well too.
Q: I’m worried setting up the bed looks complicated. Any tips?
A dinette-conversion bed can feel confusing at first. The surest approach is to have staff demonstrate it in person at pickup. Recording a video of the steps lets you check it again on the road. If your vehicle has a fixed-bed layout, there’s no setup hassle at all. Choosing a fixed-bed vehicle is a reassuring option for beginners or families traveling with children.
Q: Does overloading the vehicle affect how it drives?
Every campervan has a maximum load capacity. Exceeding it creates issues with the vehicle inspection and insurance, on top of longer braking distances and reduced handling stability. Where you place your luggage matters too — avoid piling everything at the rear or putting heavy items up high. Generally, packing 7-10 days’ worth of living supplies and food for two people rarely exceeds the load capacity, but on an outdoor-heavy trip with lots of gear, keep a conscious eye on it.
Q: Where can I check a vehicle’s equipment when renting a campervan in Hokkaido?
Each rental company’s vehicle page lists the onboard equipment. You can check things like refrigerator capacity, bed layout type, and storage configuration in advance. If anything’s unclear, asking when you book will get you a detailed answer. At pickup, you can also get a walkthrough while looking at the actual vehicle, so ask about anything you’re unsure of on the spot.
Book a Campervan in Hokkaido
Moving Inn New Chitose Airport supports English booking and offers airport transfers.

![When and Where Can You See Harbor Seals at Cape Erimo? Kaze no Yakata Official Information, Viewing Season, and Windy-Day Notes [2026-27]](https://hokkaido-campingcar.jp/wp-content/uploads/2026/10/erimo-cape-lighthouse-768x511.jpg.webp)
![Where and Under What Conditions Can You See Diamond Dust in Hokkaido? How Cold a Morning It Takes, and Where It Appears [2026-27]](https://hokkaido-campingcar.jp/wp-content/uploads/2026/10/hokkaido-diamond-dust-nayoro-768x512.jpg.webp)
![Can You Drive to Hokkaido Jingu for Hatsumode? Parking, Crowds, and Where to Park and Walk [2027]](https://hokkaido-campingcar.jp/wp-content/uploads/2026/10/hokkaido-jingu-winter-torii-768x504.jpg.webp)
![Hokkaido Roads Over New Year [2026-27] | Expressway Sections Prone to Blizzard Closures, Forecast Congestion Days, No Holiday Discount, and New Chitose Airport Parking](https://hokkaido-campingcar.jp/wp-content/uploads/2026/10/hokkaido-winter-rural-road-edge-markers-768x432.jpg.webp)
![Where to See Sea Smoke (Kearashi) in Hokkaido: Rumoi’s Ogon-misaki and the Morning Conditions [2026-27]](https://hokkaido-campingcar.jp/wp-content/uploads/2026/10/rumoi-kearashi-sea-smoke-768x511.jpg.webp)
![Geminid Meteor Shower 2026 in Hokkaido: Peak Around 23:00 on December 14, Sapporo Moonset 20:40, and Staying Warm in a Winter Campervan [2026]](https://hokkaido-campingcar.jp/wp-content/uploads/2026/10/geminids-2026-hokkaido-768x575.jpg.webp)