Rental Campervan Return Checklist | Cleaning, Tank Draining & Refueling Steps to Avoid Extra Fees (2026 Edition)
“I got charged extra fees after returning the vehicle” or “they charged me a cleaning fee” — these complaints are not uncommon in campervan rental reviews. Skipping the pre-return checks can lead to extra charges ranging from a few thousand to tens of thousands of yen.
This article walks through everything you should do before returning a rental campervan, step by step — from dealing with the water/waste tanks to interior cleaning, fuel, and checking for damage. Knowing “how far you need to go” and “when extra fees actually kick in” will let you handle return day calmly.
Campervan trips in Hokkaido are often long rentals of 3 nights/4 days to 7 nights/8 days, so the vehicle sees correspondingly heavy use. That’s exactly why knowing the pre-return routine in advance is the shortcut to wrapping up your trip without trouble.
Why the Pre-Return Check Determines Your Extra Fees
Extra fees for rental campervans generally fall into three categories: “inadequate cleaning/processing,” “insufficient fuel,” and “scratches/damage.” In almost all cases, these can be prevented with a proper pre-return check.
Extra fees from inadequate cleaning or processing
If dirt or odor remains in the vehicle, the rental company may charge a cleaning fee. This typically runs from 5,000 to 20,000 yen, depending on the severity and the company’s policy. If you return the vehicle with the grey water (household wastewater) tank or the waste tank still full, you may also be billed separately for disposal.
In every case, these charges are based on the rules stated in the rental contract. We recommend checking the terms and conditions handed to you at pickup ahead of time, so you know exactly where your obligations as the renter end.
Extra fees from insufficient fuel
Campervan rentals generally operate on a “return with a full tank” basis. If you return the vehicle with less fuel than required, the company will charge you for the fuel it adds plus a handling fee. If you accidentally put in the wrong fuel type (gasoline vs. diesel), you could face a much larger cost for tank cleaning.
Return rules for secondary fuel (for the FF heater) and LP gas also vary by company — some say “use it all up,” others require you to keep the level above a certain amount. Be sure to confirm the explanation given at pickup.
Extra fees from undeclared scratches or damage
Most rental companies check a scratch/damage list together with you before departure, but if new damage is found at return, you’ll be billed for repairs. The tricky part is not being sure whether a scratch you notice was actually caused by you. Take a photo the moment you notice any damage during the trip, and declare it before returning the vehicle — this prevents disputes later.
Deductibles and insurance coverage for damage also differ by rental company. It’s a good idea to review the terms of any optional insurance you added before you return the vehicle.
Recommended time schedule for return day
Realistically, you should start cleaning and processing two hours before your return time. Here’s a rough guide.
| 2 hours before return | Start interior cleaning and take out trash |
|---|---|
| 1.5 hours before return | Empty the grey water and waste tanks |
| 1 hour before return | Refuel and check FF heater fuel |
| 30 minutes before return | Final check for lost items and damage, take photos |
| At return | Vehicle inspection together with staff |
Emptying the grey water tank in particular may require finding a facility, which can take longer than expected. As a rule of thumb, build extra time into your schedule.
Handling the Water and Waste Tanks (Fresh Water, Grey Water, Toilet)
A campervan has three separate water systems: the “fresh water tank” (supply), the “grey water tank” (drainage), and the “waste tank” (toilet). Each needs proper handling before you return the vehicle.
Handling the fresh water tank (supply tank)
The fresh water tank stores water used for cooking, washing dishes, and washing hands. Capacity ranges from roughly 20 to 100 liters depending on the vehicle model.
Rules before return vary by company — many say it’s fine to return the vehicle with water still in the tank. Others require you to “empty it before returning” or will “charge you for the weight of any remaining water.” Check the explanation given at pickup, or the contract itself.
To drain the water, the usual method is to open the drain valve under the sink, or run the pump with all the taps open. The draining procedure is described in the vehicle manual, so it’s worth checking where that is when you pick up the vehicle.
Handling the grey water tank (household wastewater tank)
The grey water tank collects drainage from the sink and shower. Capacity is typically 20 to 60 liters, and it fills up quickly on a long trip.
Because grey water isn’t clean water, some facilities prohibit draining it into the general sewer system. Proper disposal locations include the wastewater treatment facilities at RV parks and campgrounds, or designated dump stations. Avoid dumping without permission at general facilities such as roadside stations (michi-no-eki) — that’s considered bad etiquette.
- Steps for emptying the grey water tank
- Drive to the wastewater treatment facility at an RV park/campground, or to a dump station
- Open the grey water drain valve on the underside of the vehicle and empty it toward the drain
- At facilities with running water, rinse the inside of the tank a few times before closing it
- Confirm the valve is fully closed before driving off
If the grey water tank is nearly full right before your return, you can also call a nearby RV park or campground to ask if they’ll let you empty it there (this may be a paid service, or limited to guests staying overnight). It’s reassuring to research facilities along your return route in advance where you can take care of this.
Handling the waste tank (toilet)
For cassette toilets, you remove the cassette tank and empty it yourself. For fixed flush systems (black water tanks), you’ll drain it directly at a dump station.
Here’s the procedure for emptying a cassette tank.
- Remove the cassette tank from the outer hatch or the interior drawer
- Carry it to the disposal area (dump station or slop sink) with the nozzle cap still closed
- Open the nozzle toward the drain opening and tilt slowly to empty
- Rinse the inside of the tank a few times with water
- Return the tank to the vehicle and confirm the valve is closed
As a rule, return the tank empty, or as close to empty as possible. Many rental companies treat “return with an empty waste tank” as an implicit requirement alongside “return with a full fuel tank,” so check your contract to be sure.
Compare Hokkaido Campervan Rentals
Base yourself at New Chitose Airport and compare rates, vehicle types, and pickup locations all in one place.
Compare Rental Companies and Prices →Interior Cleaning and Checking for Trash and Lost Items
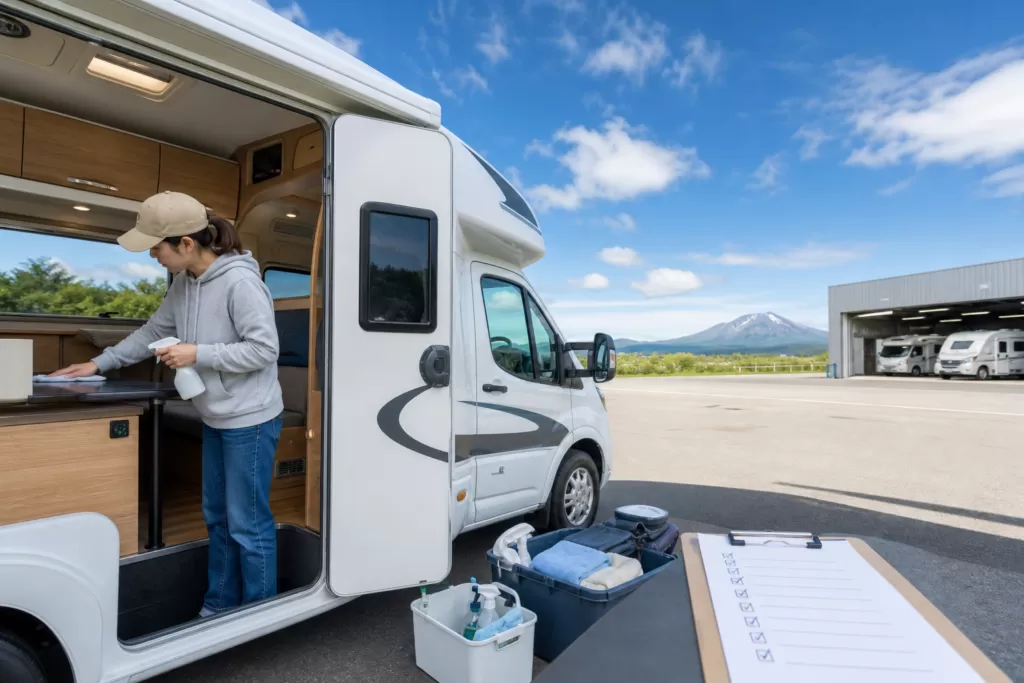
How clean the interior is will be one of the things staff check when you return the vehicle. A good rule of thumb is “leave it about as clean as when you got home from a trip.” Returning a rental vehicle dirty is also an inconvenience for the next renter. Cleaning is both good manners and a practical way to avoid extra fees.
Cleaning the floor and carpet
On outdoor trips, sand and dirt easily get tracked inside, and it shows up especially on the carpet. Use the broom or vacuum in the vehicle (if equipped) to sweep away sand and food crumbs. For heavy mud stains, wipe with a damp cloth first, then finish with a dry one.
Cleaning the kitchen area and sink
The stove and counter are places where grease easily hardens. The trick is to wipe up any mess right after your last cooking session of the trip, before it dries. The sink tends to develop water spots, so rinse it and then wipe it dry with a towel.
- Wipe grease off the stove burners and grates
- Scrub food scraps and water spots out of the sink with a sponge
- Remove all food and drinks from the fridge and wipe up any spills
- If there’s a microwave, wipe the inside
Checking the table, bed, and shelves
The table is prone to food residue and drink stains. Wipe the whole surface with wet wipes or a damp cloth. Check the bed for any bedding you brought yourself (sleeping bag, blanket, etc.) that might have been left behind. If you used rental bedding, put it back where it belongs.
Taking out the trash
As a rule, take all your trash with you. Returning the rental vehicle with trash still inside is grounds for a cleaning fee. Sort it into trash bags and take it out of the vehicle before returning it. Sort and dispose of your trash at a campground or RV park you stop at on the last day of your itinerary, or at home after you get back.
Lost item checklist
If you realize you left something behind after returning the vehicle, it’s often hard to go back and get it right away, and it leaves a bad note at the end of the trip. Check the following spots in order.
- Driver’s and passenger’s seat pockets and cup holders
- Footwell and seat pockets in the back seats
- Storage space under the bed and inside the ottoman
- The back of shelves and overhead cabinets
- Inside the fridge and microwave
- Shelves in the toilet room and shower room
- Exterior storage (inside the skirt panels, side storage compartments)
- Outdoor gear such as chairs and tables (make sure you haven’t forgotten to load them)
What happens if a lost item turns up (whether it gets mailed back cash-on-delivery, etc.) varies by rental company. Be especially careful when checking for valuables.
Handling Fuel, FF Heater Fuel, and LP Gas
Return rules for fuel vary from company to company. There are several possible patterns — “return full,” “return as-is,” “pay for usage” — so it’s important to confirm this at pickup.
Driving fuel (gasoline/diesel)
Most rental companies require you to “return with a full tank.” There may not always be a gas station near the return location, so it’s worth researching a station you can stop at along your route on the last day. In rural areas of Hokkaido, gas stations can be 20-30 km or more apart.
Always confirm the fuel type (regular, premium, or diesel) when you pick up the vehicle. If you put in the wrong fuel, contact staff immediately — this matters a lot. If you drive on it, the damage to the engine gets much worse, so stop as soon as you notice.
FF heater fuel
The FF heater (a heating system that draws combustion air from outside the vehicle) sometimes runs on diesel or a dedicated fuel from a separate tank from the driving fuel. Tank capacity is typically around 5 to 20 liters.
Rules for return vary by company — “leave it at the current level is fine,” “top it up before returning,” “use it all up,” and so on. Check the explanation or the contract, and if it’s low, top it up at a station along your return route. Also confirm the fuel type for the FF heater (whether it’s diesel or not).
LP gas (propane)
On vehicles where LP gas is the heat source for the stove, fridge, and water heater, you also need to check the remaining gas level. Generally, you can return the vehicle with the gas as-is, but if you use it all up, check the contract for how replacement is handled and who covers the cost.
Always close the gas main valve before returning the vehicle. Leaving the gas valve open while driving carries a risk of gas leaks, so it’s a good habit to close it before moving the vehicle — not just when boarding a ferry.
- Fuel and gas pre-return checklist
- Filled the driving fuel tank (keep the receipt from the gas station)
- Confirmed the fuel type and filled with the correct one
- Checked and topped up the FF heater fuel level (per contract rules)
- Closed the LP gas main valve
- Checked the remaining gas level and prepared to report if it ran out
New Chitose Airport / Tokachi-Obihiro Airport
Rent the Cab-Con “Cresson Journey”
Base yourself at New Chitose Airport and travel all across Hokkaido by campervan.
See Details at Moving Inn →Checking and Declaring Damage and Equipment
“I didn’t notice” won’t necessarily cut it once the vehicle has been returned with damage found. By checking the vehicle yourself before return and declaring any damage that occurred during the trip to staff, you can prevent misunderstandings and disputes later.
Checking the exterior for damage
Before returning the vehicle, walk all the way around it and check the exterior for scratches, dents, and dirt. Have the checklist you filled out with staff at pickup on hand, and compare it against any new marks.
- Front bumper and around the grille
- Side mirrors and side panels (scuffs)
- Rear bumper and back door
- Roof (around the FF heater and vents)
- Tires and wheels (curb rash)
- Sliding door and rail scratches
If you find damage, take a photo with your phone on the spot. Declare it to staff at return and check whether insurance/deductible coverage applies. If you say nothing and return the vehicle, there’s a higher risk it gets treated as “damage discovered at return” and billed in full. Declaring it yourself is the shortcut to getting insurance applied.
Checking interior equipment and supplies
Compare against the equipment list you were given at pickup to confirm everything loaned to you is still there. Commonly lost or forgotten items include the following.
- External power cable (shore power/EXT cable)
- Hoses (water supply hose, drain hose)
- Power adapters and plug converters
- Chairs and tables (left outside and forgotten when loading up)
- Tarp, stakes, and poles
- Vehicle manual and emergency contact card
- ETC card (if one was lent to you)
If any equipment is missing, you may be asked to cover the replacement cost. The external power cable in particular tends to be expensive to replace if lost, so be careful with it.
Confirming mileage and optional equipment charges
If your rental company charges based on mileage, they will check the odometer reading at return. This gets compared against the reading at departure, and if you’ve exceeded the set distance, an additional charge applies.
If you rented options such as a navigation system, child seat, or Wi-Fi router, you need to return them at return time. Confirm any additional charges for options with staff during the vehicle inspection.
On a winter return, can you hand the van back with snow or mud on it, or with chains still fitted? Do you need to wash it or clear the snow?
For returning a vehicle with snow or mud still on it, returning it with chains still fitted, whether washing or snow removal is required, and any extra charge for these, no provision was found in the official user guides, guides, FAQs or terms of the seven companies below (checked 2026-10-15). The absence of a provision does not mean you may return the vehicle as it is. If you rent in winter, these are points to ask the company about when you book.
| Company | Mention of snow, mud, chains or washing | Details |
|---|---|---|
| Moving Inn New Chitose Airport store | Not stated officially (2026-10-15) | Base page |
| Camping Lines Hokkaido Sapporo BASE | Not stated officially (2026-10-15) | Base page |
| FOX Camper Chitose store | Not stated officially (2026-10-15) | Base page |
| Hokkaido Nomad Rent-a-Car Chitose store | Not stated officially (2026-10-15) | Base page |
| North Camper | Not stated officially (2026-10-15) | Base page |
| New Chitose Camping Car Rental Center | Not stated officially (2026-10-15) | Base page |
| Ureska Sapporo BASE | Not stated officially (2026-10-15) | Base page |
What the official pages did say about returns concerned fuel and a vehicle check. Camping Lines Hokkaido, Ureska and New Chitose Camping Car Rental Center say they check the exterior for damage, the fuel level and left-behind items at return, and Moving Inn has you return the vehicle to the rental base with a full tank and have it checked (each company’s official page, checked 2026-10-15). In the winter season, Camping Lines Hokkaido fixes pickups and returns at New Chitose Airport to four slots: 9:00, 12:00, 15:00 and 17:00 (official user guide, checked 2026-10-15).
The day before you return in winter, confirm the return time, how snow and mud are handled, and whether you may return with chains still fitted, on the base page of the company you rented from or through its official contact. How each company handles winter tyres is summarised in the article on winter tyre support by company.
Frequently Asked Questions (FAQ)
Q: How thoroughly do I need to clean before returning the vehicle?
The general standard is “return it to the condition it was in when you picked it up.” If you remove the sand, food crumbs, and trash from the floor, and wipe down the kitchen and table, most companies won’t charge an extra cleaning fee. Serious grease stains, bad odors, or trash left in the vehicle can trigger a cleaning fee. If you’re unsure, the safest bet is to call the rental company before returning the vehicle.
Q: Where can I empty the grey water tank?
You can empty it at the wastewater treatment facilities at RV parks and campgrounds, or at dump stations. RV parks are scattered across eastern, central, and northern Hokkaido, and it’s realistic to stop and empty the tank as part of your itinerary. It’s reassuring to research facilities along your return route in advance. Avoid dumping without permission at general facilities such as roadside stations (michi-no-eki), as this can cause trouble.
Q: Is there a gas station near the return location where I can fill up?
This depends on the return location. Around New Chitose Airport there are relatively many stations, but return locations in rural areas may not have one nearby. It’s reassuring to check the return address and nearby gas stations on a map in advance, and refuel with time to spare. It’s a good idea to build a refueling stop into your driving route on the last day.
Q: If I declare damage that occurred during the trip, will I have to pay the full cost myself?
Whether insurance/deductible coverage applies once you declare damage depends on the insurance option you took out and the company’s rules. If your insurance has a deductible (a cap on out-of-pocket cost), the company covers repair costs above that amount. In some cases, insurance won’t apply at all if you return the vehicle without declaring the damage. If damage occurs during your trip, we recommend contacting the rental company as early as possible.
Q: If I leave something behind, can it be mailed back to me?
Many rental companies will mail lost items back to you cash-on-delivery. That said, whether they can do this, who pays shipping, and how long they hold items varies by company. If you realize you’ve left something behind after returning the vehicle, contact the rental company right away. We especially recommend double-checking for valuables (wallet, phone, passport, etc.).
Q: What should I do if I’m going to be late for the return time?
Contact the rental company as early as possible. Showing up late without notice can result in extra fees. On the other hand, if you contact them ahead of time, most companies will accommodate an extension procedure (changing the time in exchange for an extra fee). Even for unavoidable circumstances like traffic, weather, or ferry delays, a single phone call usually makes the company much more flexible in accommodating you.
Book a Campervan in Hokkaido
Moving Inn New Chitose Airport supports English booking and offers airport transfers.
![Can You Rent a Campervan in Hokkaido in Winter (Dec–Mar)? Companies With Winter Closures and What to Check Before Booking [2026]](https://hokkaido-campingcar.jp/wp-content/uploads/2026/10/hokkaido-campingcar-rental-winter-open-eyecatch-768x432.webp)